
Honeywell VisionPRO 8000 offers advanced control of home comfort, detailed in its installation manual (69-1706). This touchscreen thermostat, like the TH8321WF1001, provides Wi-Fi connectivity.
The manual, available as a PDF, guides users through setup, operation, and troubleshooting. It’s a crucial resource for connecting and controlling your HVAC system remotely.
RoHs compliant and manufactured by Honeywell in Golden Valley, MN, the VisionPRO series (TH8000) simplifies temperature management with intuitive features and programming options.
Overview of the Thermostat
The Honeywell VisionPRO 8000 is a sophisticated, touchscreen programmable thermostat designed for optimal home climate control. As detailed in installation manual 69-1706, this thermostat offers a user-friendly interface and advanced scheduling capabilities. It’s part of the TH8000 series, including models like the TH8321WF1001, known for its smart functionality.
This thermostat isn’t just about setting temperatures; it’s about creating a comfortable and energy-efficient environment. The manual emphasizes its ability to connect to your HVAC system via Wi-Fi, enabling remote monitoring and adjustments through a mobile app. Honeywell prioritizes compliance, as indicated by its RoHs certification, ensuring responsible manufacturing.
The VisionPRO 8000 supports both heating and cooling systems, offering automatic or manual changeover options. Its intuitive design and comprehensive manual make it accessible for both DIY enthusiasts and professional installers. It’s a central hub for managing your home’s temperature, offering convenience and control.
Key Features and Benefits
The Honeywell VisionPRO 8000, as outlined in installation manual 69-1706, boasts a vibrant touchscreen display for easy navigation and programming. A key benefit is its Wi-Fi connectivity, allowing remote control via the Honeywell Home app – a feature highlighted in the TH8321WF1001 user guide.
Beyond convenience, the thermostat offers programmable schedules to optimize energy usage and reduce costs. The manual details options for automatic or manual system changeover, adapting to various HVAC configurations. Honeywell’s commitment to quality is reflected in its RoHs compliance.
Further benefits include detailed reporting on energy consumption and customizable comfort settings. The thermostat supports multiple heating and cooling stages, ensuring precise temperature control. Installation is streamlined with the comprehensive manual, making it a valuable upgrade for any home seeking enhanced comfort and efficiency.
Package Contents Verification
Upon receiving your Honeywell VisionPRO 8000, referencing the installation manual (69-1706) is crucial for verifying all components are present. While a detailed parts list isn’t explicitly provided in the snippets, ensure the package includes the thermostat base, the touchscreen display unit, and mounting hardware.
Carefully check for included screws, wall anchors, and wire labels – essential for a successful installation. The manual likely details specific quantities of each item. Confirm the presence of any jumper wires needed for compatibility with your existing HVAC system.
It’s also important to verify the inclusion of a quick start guide or a condensed version of the full installation manual. If any components are missing, immediately contact Honeywell Customer Care (details available online) before proceeding with the installation process to avoid delays.

Safety Precautions
Honeywell’s installation manual stresses electrical safety; disconnect power before wiring. General warnings advise caution during installation, ensuring a secure and compliant setup.
Electrical Safety Guidelines
Honeywell emphasizes strict adherence to electrical safety when installing the VisionPRO 8000. Crucially, always disconnect power to the HVAC system at the breaker box before beginning any wiring connections. This prevents electrical shock and potential damage to the thermostat or HVAC equipment.
The installation manual (69-1706) details proper grounding procedures and warns against working with live wires. If you are uncomfortable with electrical work, immediately consult a qualified HVAC technician. Ensure all wiring connections are secure and comply with local electrical codes. Improper wiring can create a fire hazard or damage the thermostat’s sensitive electronic components.
Double-check that the power is off using a non-contact voltage tester before touching any wires. Never attempt to modify or bypass any safety features of the HVAC system or the thermostat. Prioritize safety throughout the entire installation process.
General Installation Warnings
The Honeywell VisionPRO 8000 installation manual (69-1706) contains vital warnings. Incorrect installation can lead to improper system operation, potentially damaging your HVAC equipment or voiding the warranty. Always read and fully understand the instructions before starting.
Specifically, the manual cautions against forcing any components during installation. Ensure proper wire gauge is used for all connections, as specified in the documentation. Avoid installing the thermostat in direct sunlight or near sources of extreme heat or cold, which can affect its accuracy.
Furthermore, the manual stresses the importance of verifying HVAC system compatibility before installation. Improperly matched systems can result in inefficient operation or equipment failure. If unsure about any aspect of the installation, consult a qualified HVAC professional.
Tools Required for Installation
The Honeywell VisionPRO 8000 installation manual (69-1706) doesn’t explicitly list every tool, but successful installation requires several standard items. A small flathead and Phillips head screwdriver are essential for terminal block connections and mounting the thermostat base.
Wire strippers are crucial for preparing the existing HVAC wiring for connection to the new thermostat. A level ensures the thermostat base is mounted straight, providing a professional appearance and accurate readings. A pencil is useful for marking wire locations and mounting holes.
Additionally, a voltage tester is highly recommended to verify power is completely off to the HVAC system before commencing any wiring work. Depending on the installation location, a drill with appropriate bits may be needed for creating mounting holes. Safety glasses are always advisable.

Pre-Installation Checklist
Before installing the Honeywell VisionPRO 8000, consult the manual (69-1706) to verify HVAC compatibility and identify existing wiring for a smooth process.
Always turn off power to the HVAC system before beginning, ensuring safety during installation and preventing electrical hazards.
Compatibility with HVAC Systems
Honeywell VisionPRO 8000 thermostat compatibility is a critical pre-installation step, thoroughly detailed within the installation manual (69-1706). This thermostat generally supports conventional 24V heating and cooling systems, including furnaces, air conditioners, heat pumps, and boilers.
However, the manual emphasizes verifying system voltage and wiring configurations. It’s crucial to confirm compatibility with millivolt systems, or those utilizing proprietary communication protocols. Systems requiring a “C” wire (common wire) are generally supported, but the manual outlines solutions for systems lacking one, potentially requiring a C-wire adapter.
Specifically, the manual references ISU 101 compatibility and directs users to THP9045 instructions for further details. Incorrect wiring or incompatibility can damage the thermostat or HVAC system, so careful review of the manual is paramount before proceeding with installation.
Identifying Existing Wiring
Before installing the Honeywell VisionPRO 8000, the installation manual (69-1706) stresses the importance of accurately identifying existing HVAC wiring. Carefully remove your old thermostat’s faceplate to expose the wires, and manually label each wire with its corresponding terminal designation.
Common terminals include R (power), C (common – often missing in older systems), W (heating), Y (cooling), and G (fan). The manual provides diagrams illustrating typical wiring configurations. Note any jumper wires present, as these may indicate specific system setups.
Pay close attention to wire colors, but always rely on the terminal labels, as color coding isn’t standardized. Document the wiring thoroughly – a photograph is highly recommended – before disconnecting anything. Incorrect wiring can lead to system malfunction or damage, so meticulous identification is crucial.
Turning Off Power to the HVAC System
The Honeywell VisionPRO 8000 installation manual (69-1706) emphatically prioritizes safety, beginning with completely disconnecting power to your HVAC system. Locate the circuit breaker that controls your furnace and air conditioner within your electrical panel.
Manually switch this breaker to the “OFF” position. To verify power is indeed off, use a non-contact voltage tester at the thermostat wires – ensure no voltage is detected. This step is non-negotiable, preventing electrical shock and potential damage to the thermostat or HVAC equipment.
Double-check that the breaker is off before proceeding with any wiring connections. A warning is included in the manual regarding electrical safety guidelines. Ignoring this precaution could result in serious injury or system failure.

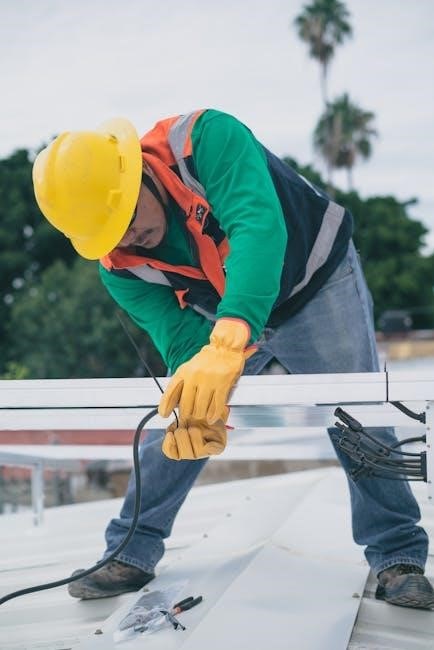
Installation Process
The Honeywell VisionPRO 8000 manual (69-1706) details mounting the base, connecting wiring, and attaching the display—essential steps for a successful installation.
Mounting the Thermostat Base
Before mounting, ensure the power to your HVAC system is completely off – a critical safety precaution detailed in the Honeywell VisionPRO 8000 installation manual (69-1706). Carefully remove your old thermostat, noting the wiring configuration for later reference.
The VisionPRO baseplate should be mounted on a level surface, avoiding direct sunlight or drafts that could affect temperature readings. Use the provided screws and wall anchors, ensuring a secure attachment; The manual emphasizes proper alignment for a flush fit and easy display attachment.
Important: Feed the existing thermostat wires through the opening in the baseplate before fully securing it to the wall. Double-check that the base is firmly mounted before proceeding to the wiring stage, as a loose base can cause connection issues. Refer to the diagrams in the manual for visual guidance.
Connecting the Wiring – Detailed Guide
Refer to the Honeywell VisionPRO 8000 installation manual (69-1706) for precise wiring diagrams, as configurations vary by HVAC system. Carefully match each wire to the corresponding terminal on the thermostat base – common terminals include R, C, W, Y, and G.
The manual highlights the importance of securely connecting each wire, ensuring no bare wire is exposed. Use a small screwdriver to tighten the terminal screws, but avoid over-tightening. Pay close attention to the ISU 101 compatibility notes within the manual if applicable.
Caution: Incorrect wiring can damage your HVAC system. If unsure, consult a qualified HVAC technician. The manual provides specific instructions for systems with a common wire (C-wire) and those without, detailing potential workarounds if a C-wire is missing.
Attaching the Thermostat Display
According to the Honeywell VisionPRO 8000 installation manual (69-1706), once the wiring is securely connected to the baseplate, carefully align the thermostat display with the mounting plate. Gently press the display onto the base, ensuring it clicks firmly into place.
The manual emphasizes a secure connection to ensure proper functionality and prevent accidental disconnections. Avoid forcing the display; if it doesn’t align easily, double-check the wiring connections and the baseplate’s mounting.
After attachment, verify the display is stable and properly seated. The touchscreen should respond to touch inputs. The manual details initial power-up procedures and screen navigation following display attachment, guiding users through the setup process.
Initial Setup and Configuration
Honeywell’s VisionPRO 8000 manual guides users through powering on, navigating the touchscreen, and setting the date/time. Configuring the system type—heating or cooling—is essential.
Powering On and Initial Screen Navigation
According to the Honeywell VisionPRO 8000 installation manual (69-1894EFS-03), upon initial power-up, the thermostat will guide you through a startup sequence. The touchscreen display will illuminate, presenting the main menu.
Familiarize yourself with the intuitive interface; it’s designed for easy navigation. The manual details how to access various settings, including system mode, temperature adjustments, and scheduling options. Expect prompts to configure basic settings like date and time.
The touchscreen responds to gentle touches, allowing you to select options and enter information. The manual emphasizes understanding the icons and symbols displayed on the screen, as they represent key functions. Explore the menu structure to locate features like fan control and system information.
Refer to the VisionPRO manual for specific instructions on navigating the touchscreen and understanding the initial setup prompts.
Setting the Date and Time
The Honeywell VisionPRO 8000 installation manual (69-1894EFS-03) highlights setting the correct date and time as a crucial initial step. This ensures accurate scheduling and proper operation of your heating and cooling system.
Access the date and time settings through the main menu on the touchscreen display; The manual provides step-by-step instructions for navigating to this section. You’ll likely use up and down arrows, or a similar interface, to adjust the month, day, year, hour, and minute.
Pay close attention to the AM/PM setting to avoid errors. Confirm your selections carefully before saving, as incorrect time settings can disrupt programmed schedules. The VisionPRO thermostat relies on accurate timekeeping for optimal performance.
Refer to the manual’s illustrations for visual guidance during this process. Accurate date and time configuration is fundamental for utilizing the thermostat’s full capabilities.
Configuring System Type (Heating/Cooling)
The Honeywell VisionPRO 8000 installation manual (69-1894EFS-03) emphasizes correctly configuring your system type – whether it’s heating, cooling, or a combination of both. This setting dictates how the thermostat controls your HVAC equipment.
Access the system configuration menu through the thermostat’s touchscreen interface. The manual details the specific navigation steps. You’ll typically select from options like “Heating Only,” “Cooling Only,” “Heat Pump,” or “Conventional.”
Choosing the wrong system type can lead to inefficient operation or even damage to your equipment. If you have a heat pump, ensure you select the appropriate heat pump setting. The VisionPRO supports various system configurations.
Consult the manual’s diagrams and explanations to determine the correct setting for your specific HVAC setup. Accurate configuration is vital for optimal comfort and energy savings. Double-check your selection before saving.

Advanced Settings
Honeywell VisionPRO 8000’s advanced features, detailed in the installation manual, include programming schedules, Wi-Fi setup, and mobile app integration for remote control.
Programming Schedules
Honeywell VisionPRO 8000 allows for highly customizable heating and cooling schedules, detailed within the installation manual. Users can create unique programs for each day of the week, optimizing comfort and energy savings.
The thermostat supports multiple periods per day – wake, leave, return, and sleep – enabling precise temperature control throughout the day. Programming can be adjusted directly on the touchscreen interface, offering a user-friendly experience. The manual provides step-by-step instructions for setting up these schedules, including options for temporary overrides and vacation modes.
Advanced scheduling features allow for different settings on weekends versus weekdays, and the system remembers programmed settings even during power outages. Understanding these scheduling capabilities, as outlined in the manual, is key to maximizing the thermostat’s efficiency and tailoring it to individual lifestyles.
Wi-Fi Connectivity Setup
The Honeywell VisionPRO 8000’s Wi-Fi capabilities, thoroughly explained in the installation manual, enable remote control and monitoring via the Honeywell Home app. Setup involves connecting the thermostat to your home’s 2.4 GHz Wi-Fi network.
The manual guides users through the on-screen prompts, requiring the network name (SSID) and password. Successful connection is indicated by a Wi-Fi icon on the thermostat display. Troubleshooting tips within the manual address common connectivity issues, such as incorrect passwords or network range limitations.
Once connected, the thermostat can be controlled remotely, allowing adjustments to temperature settings, schedules, and system modes from anywhere with an internet connection. The manual emphasizes the benefits of this feature for energy management and convenience.
Remote Access and Mobile App Integration
The Honeywell VisionPRO 8000, as detailed in the installation manual, seamlessly integrates with the Honeywell Home mobile app, unlocking powerful remote access features. This integration allows users to monitor and control their HVAC system from any location with an internet connection.
The manual provides step-by-step instructions for downloading and setting up the app, including account creation and thermostat pairing. Through the app, users can adjust temperature settings, create and modify schedules, and receive alerts regarding system status.
Remote access enhances energy efficiency and comfort, enabling adjustments based on real-time needs. The Honeywell Home app offers a user-friendly interface, making it easy to manage home climate control, even when away from home.
Troubleshooting Common Issues
The manual addresses issues like the thermostat not powering on, incorrect temperature readings, and Wi-Fi connection problems, offering solutions for optimal performance.
Detailed diagnostics and troubleshooting steps are provided to resolve common problems, ensuring reliable operation of your Honeywell VisionPRO 8000 system.
Thermostat Not Powering On
If your Honeywell VisionPRO 8000 fails to power on, the installation manual (69-1706) outlines several troubleshooting steps. First, verify the HVAC system’s power switch is on and the circuit breaker hasn’t tripped.
Carefully re-examine the wiring connections at both the thermostat base and the furnace control board, ensuring they are secure and correctly placed according to the wiring diagram. A loose connection is a frequent cause.
Confirm the ‘C’ wire (common wire) is properly connected, as this provides continuous power to the thermostat. If a ‘C’ wire isn’t present, a ‘C’ wire adapter might be necessary – consult a qualified HVAC technician for assistance.
Check the thermostat’s batteries (if applicable) and replace them if depleted. Finally, review the manual’s section on power requirements to ensure compatibility with your HVAC system’s voltage.
Incorrect Temperature Readings
If the Honeywell VisionPRO 8000 displays inaccurate temperatures, the installation manual (69-1706) suggests several checks. First, ensure the thermostat isn’t directly exposed to sunlight, drafts, or heat-generating appliances, as these can skew readings.
Verify the thermostat is level; an uneven installation can affect sensor accuracy. The manual details proper mounting procedures. Check for obstructions near the thermostat that might impede airflow around the temperature sensor.
Calibrate the temperature reading within the thermostat’s settings menu. The manual provides step-by-step instructions for temperature offset adjustments. Confirm the system type (heating/cooling) is correctly configured, as this impacts temperature interpretation.
If issues persist, consider a sensor malfunction and consult Honeywell customer support or a qualified HVAC technician for further diagnosis and potential replacement.
Wi-Fi Connection Problems
The Honeywell VisionPRO 8000’s Wi-Fi functionality, detailed in the installation manual (69-1706), can sometimes encounter connection issues. First, confirm your home Wi-Fi network is functioning correctly and has a strong signal strength at the thermostat’s location.
Double-check the Wi-Fi password entered during setup; incorrect credentials are a common cause of failure. The manual guides you through the Wi-Fi connectivity setup process. Restart both your router and the thermostat – a simple reboot often resolves temporary glitches;
Ensure the thermostat is within range of your Wi-Fi router. Verify the router’s security settings are compatible with the thermostat (WPA2 is generally recommended). If problems continue, consult the online manuals and FAQs on honeywell.com.
Contact Honeywell Customer Support for advanced troubleshooting assistance if needed.

Resources and Support
Honeywell provides extensive support for the VisionPRO 8000, including a customer support line and online resources like manuals and FAQs at honeywell.com.
Warranty information is also available, ensuring peace of mind with your new thermostat installation.
Honeywell Customer Support Contact Information
Honeywell offers dedicated customer support to assist with your VisionPRO 8000 thermostat, including installation and troubleshooting. For immediate assistance, contacting their support team directly is recommended.
While specific phone numbers may vary, referencing the installation manual (69-1706) or visiting the official Honeywell Home website (honeywell.com) will provide the most current contact details. These resources typically list phone numbers for both general inquiries and technical support.
Additionally, the website often features a comprehensive FAQ section and online chat support for quick answers to common questions. Registering your thermostat on the Honeywell Home platform can also unlock access to personalized support and exclusive resources. Don’t hesitate to reach out – Honeywell is committed to ensuring a smooth experience with your smart home system.
Online Manuals and FAQs
Honeywell provides extensive online resources for the VisionPRO 8000 thermostat, including downloadable manuals and frequently asked questions. The installation manual (69-1706) is readily available as a PDF file, offering detailed step-by-step instructions.
Visiting honeywell.com allows access to the latest versions of user guides, installation guides, and troubleshooting documents. The website’s FAQ section addresses common issues, covering topics from initial setup to Wi-Fi connectivity and advanced programming.
Specifically, the Honeywell Home 8000 Wi-Fi VisionPRO Thermostat User Guide, posted October 18, 2023, provides valuable insights. These online resources empower users to self-resolve issues and maximize the benefits of their smart thermostat, ensuring a seamless and efficient home comfort experience.
Warranty Information
While the provided documentation snippets don’t detail specific warranty terms, Honeywell generally offers a warranty on its VisionPRO 8000 thermostats. Referencing the installation manual (69-1706) or contacting Honeywell Customer Care is crucial for precise warranty details.
Typically, the warranty covers defects in materials and workmanship under normal use. It’s important to retain proof of purchase, such as a receipt, to validate any warranty claim. The warranty period may vary depending on the specific model and region.
For comprehensive warranty information, including limitations and exclusions, visit honeywell.com or consult the documentation included with your thermostat. Registering your product on the Honeywell website may also be required to activate the warranty.
No Responses